On 2026-02-07 I helped Charlotte cut out a hood out of a lovely purple wool. Since it doesn’t fray, the next day I taught her the Ösenstitch to sew it.
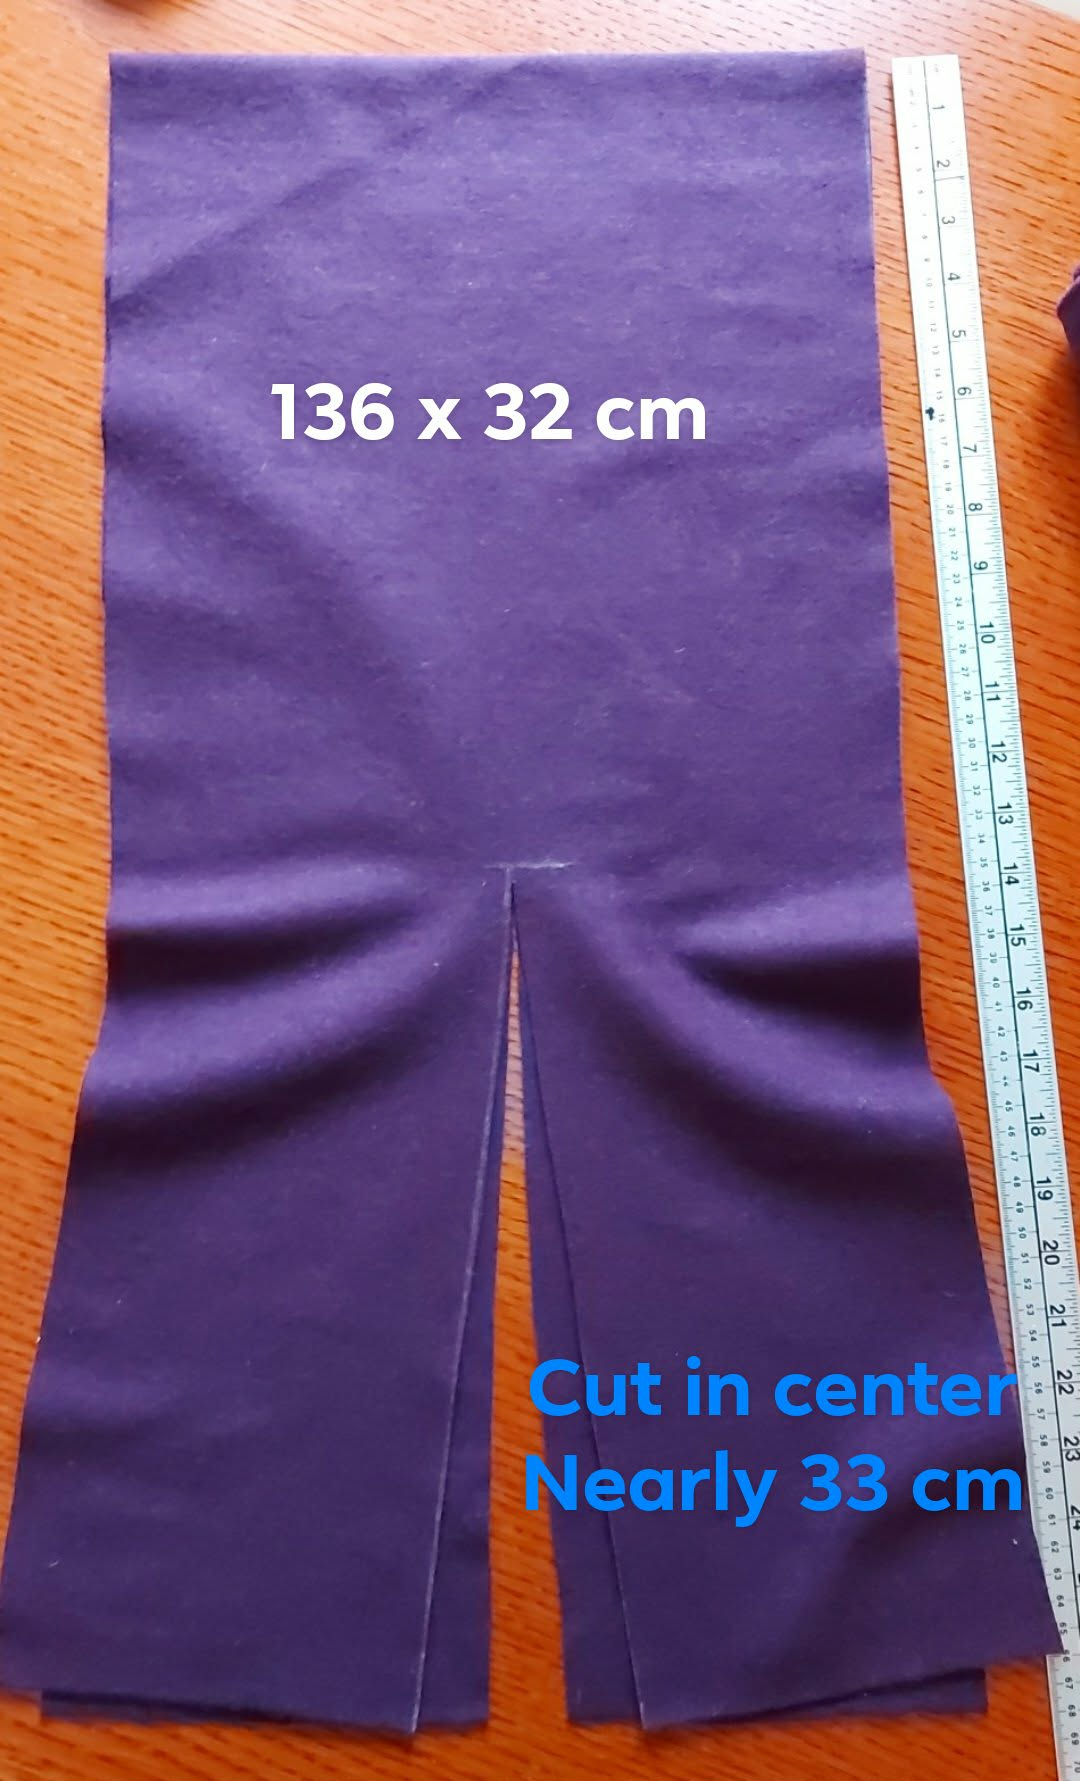
Main Hood rectangle
This sort of hood is a simple rectangle/triangle construction, where the rectangle is wide enough to cover the head from front to back, and long enough to drape over the head and shoulders as far down the body as wished. In this case we used the full width of the fabric for the length of the rectangle, or 136 cm, and made the width 32 cm.
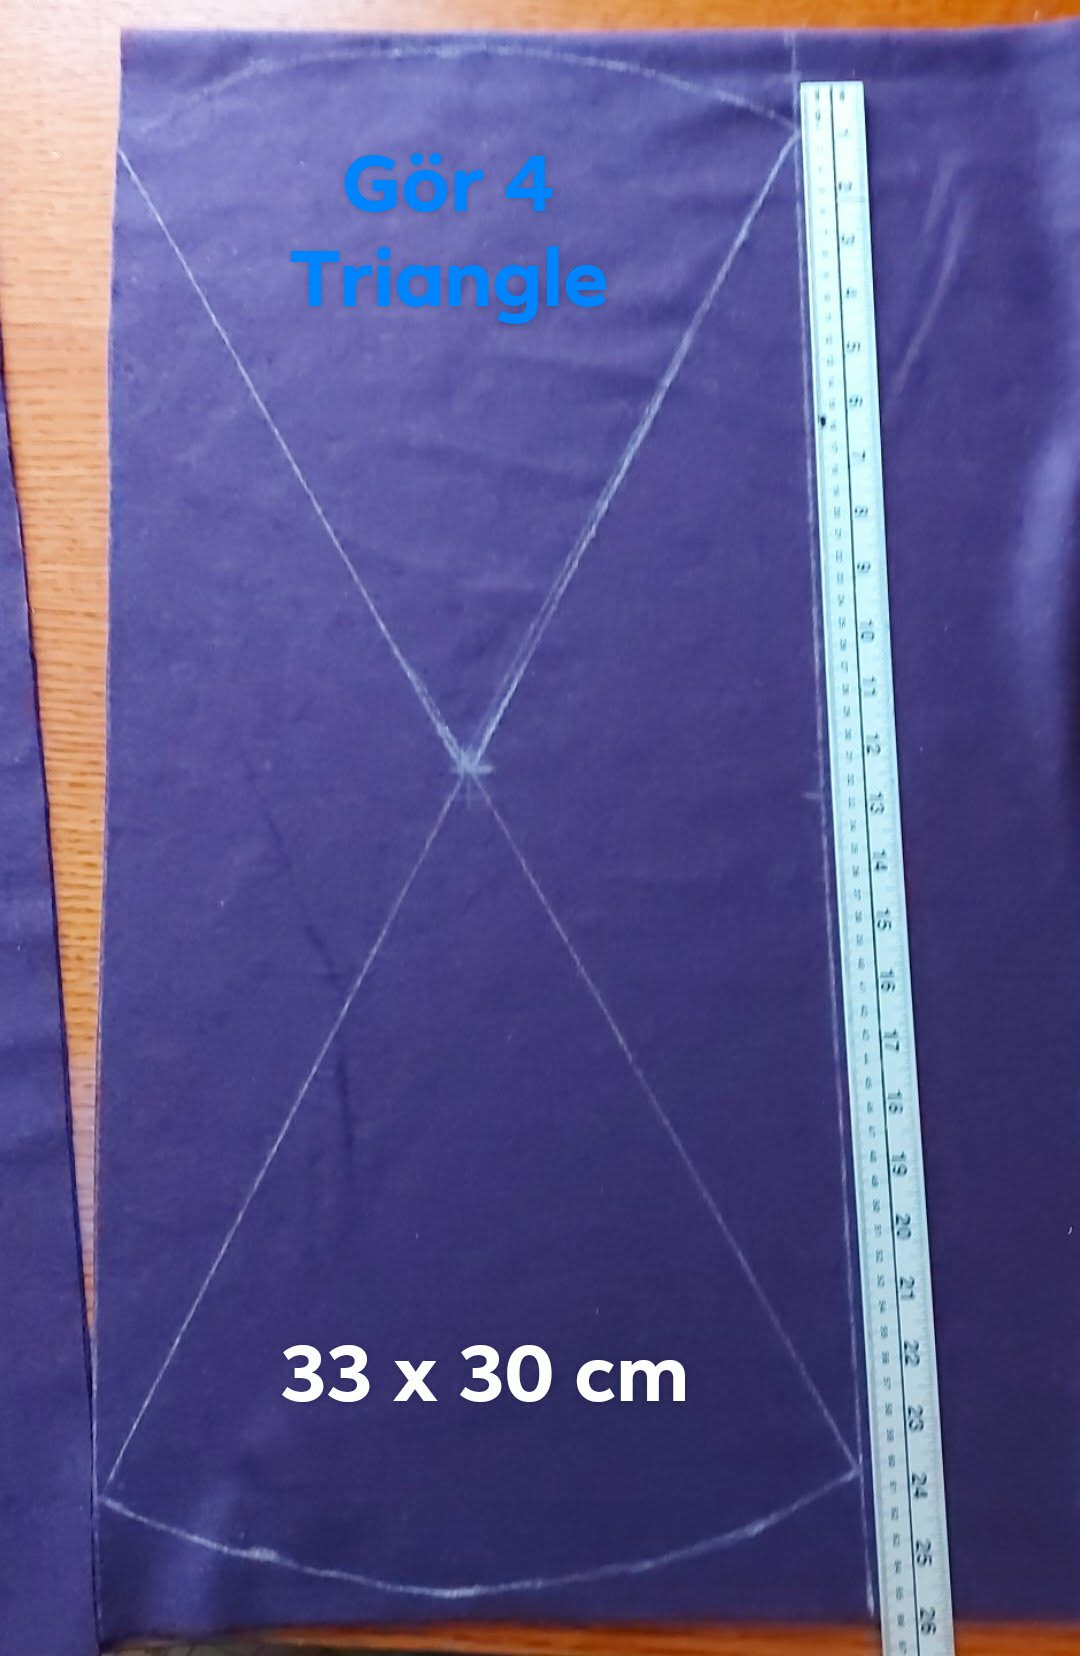
The gores
This style of hood has four gores, one each centred on front and back, and one each centred on each shoulder. I often do these by starting with a square, cutting it into three triangles, one full width, and two others half width, which I then sew together to make a a wider triangle. However, Charlotte is new to sewing, so to make this one easier we just made the triangles 33 cm tall and 30 cm wide,
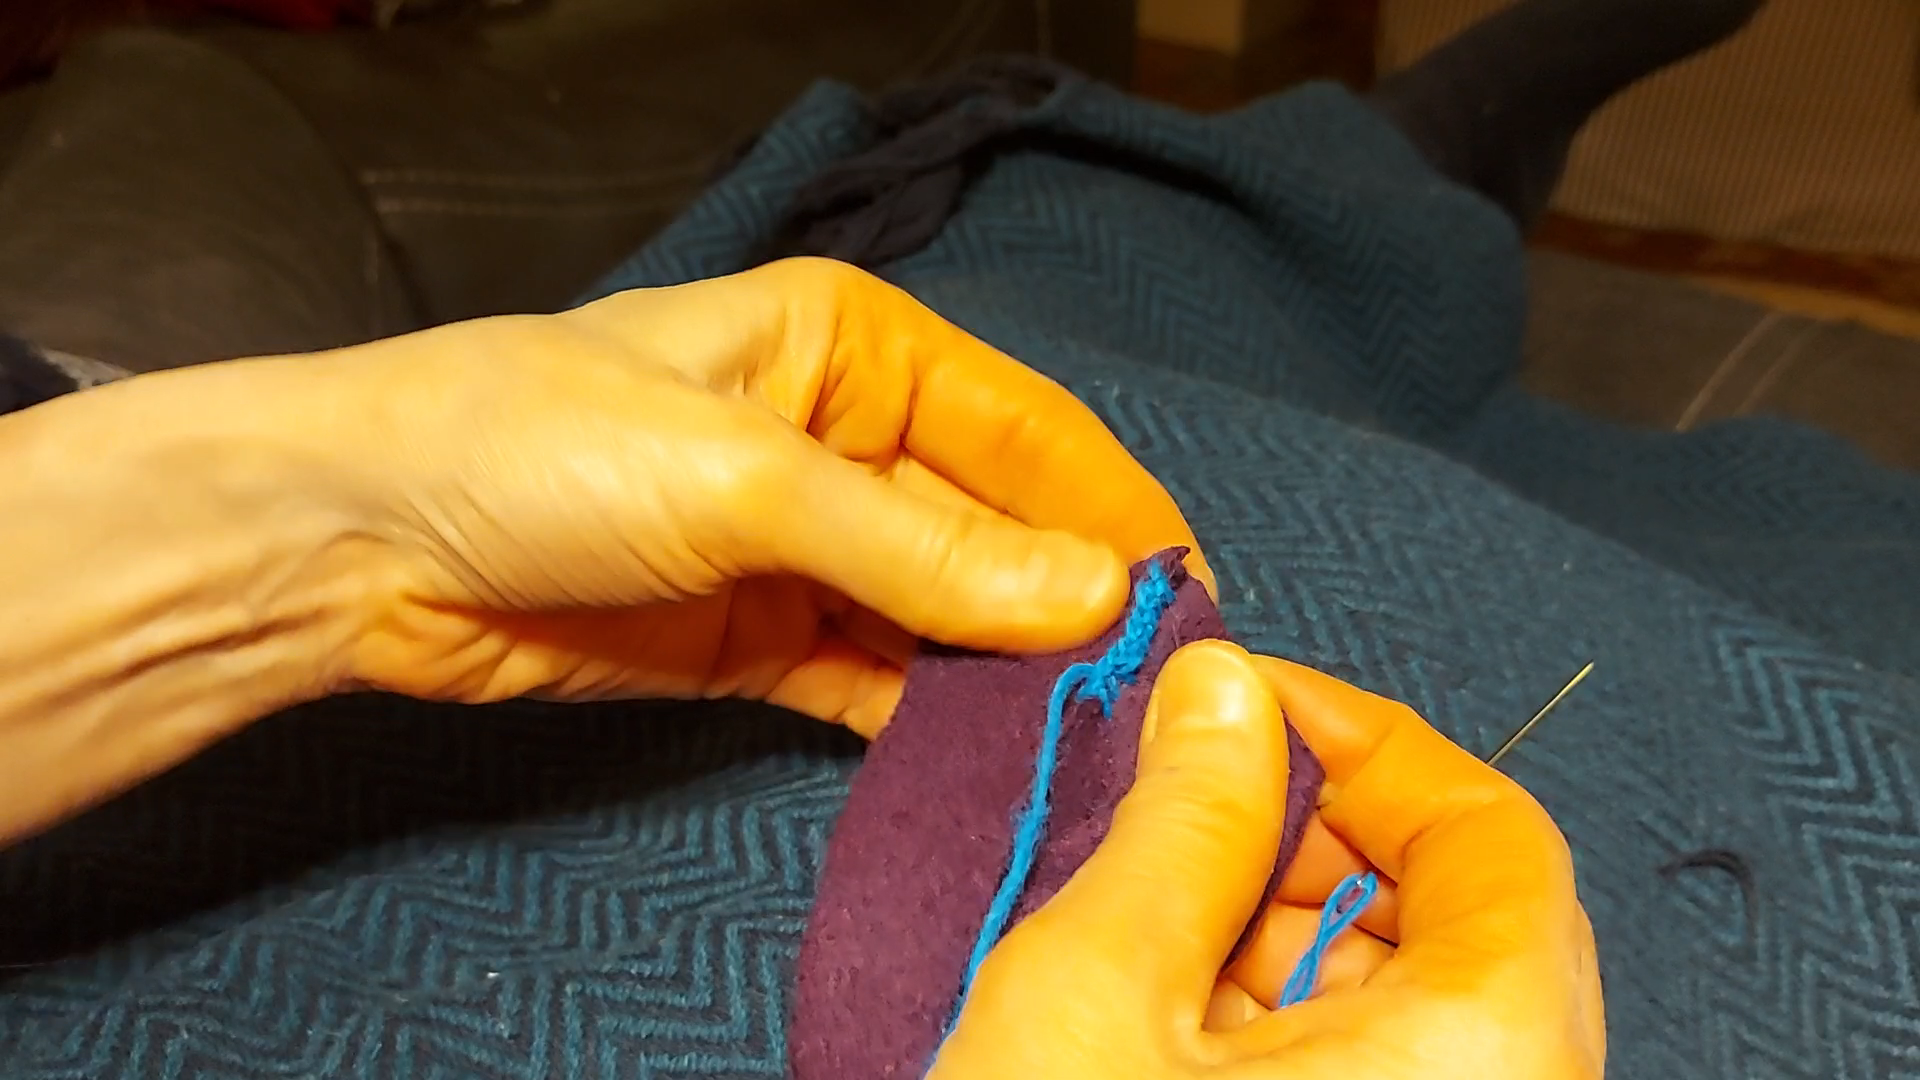
The Osenstitch done with the same fabric and yarn as the project
Because this fabric is dense and doesn’t fray easily, we decided to simply sew the hood using the Osenstich with narrow arms, just over the edge of the fabric. By placing the stitches a couple of mm from the cut edge it is far enough in to hold the fabric together without pulling out, yet near enough to the edge to allow the seam to open up nice and flat.
Alas, the video isn’t yet working n the blog, but it is too late to fight with it more tonight. Will try to fix later
An attempt to fix the video, using relative path:
and an attempt to fix it using a more explicit path
This version may be the same as one of the above:
“
Another alternative would have been to do a straight seam further from the edge, and then turn the cut edges down and finish them with the Osenstitch. Since Charlotte would like the hood to wear at Double Wars, we decided to do this version, which only requires sewing each seam once.
Closeup of the Ösenstitch
Here is a closeup of the stitch after the fabric opens up.