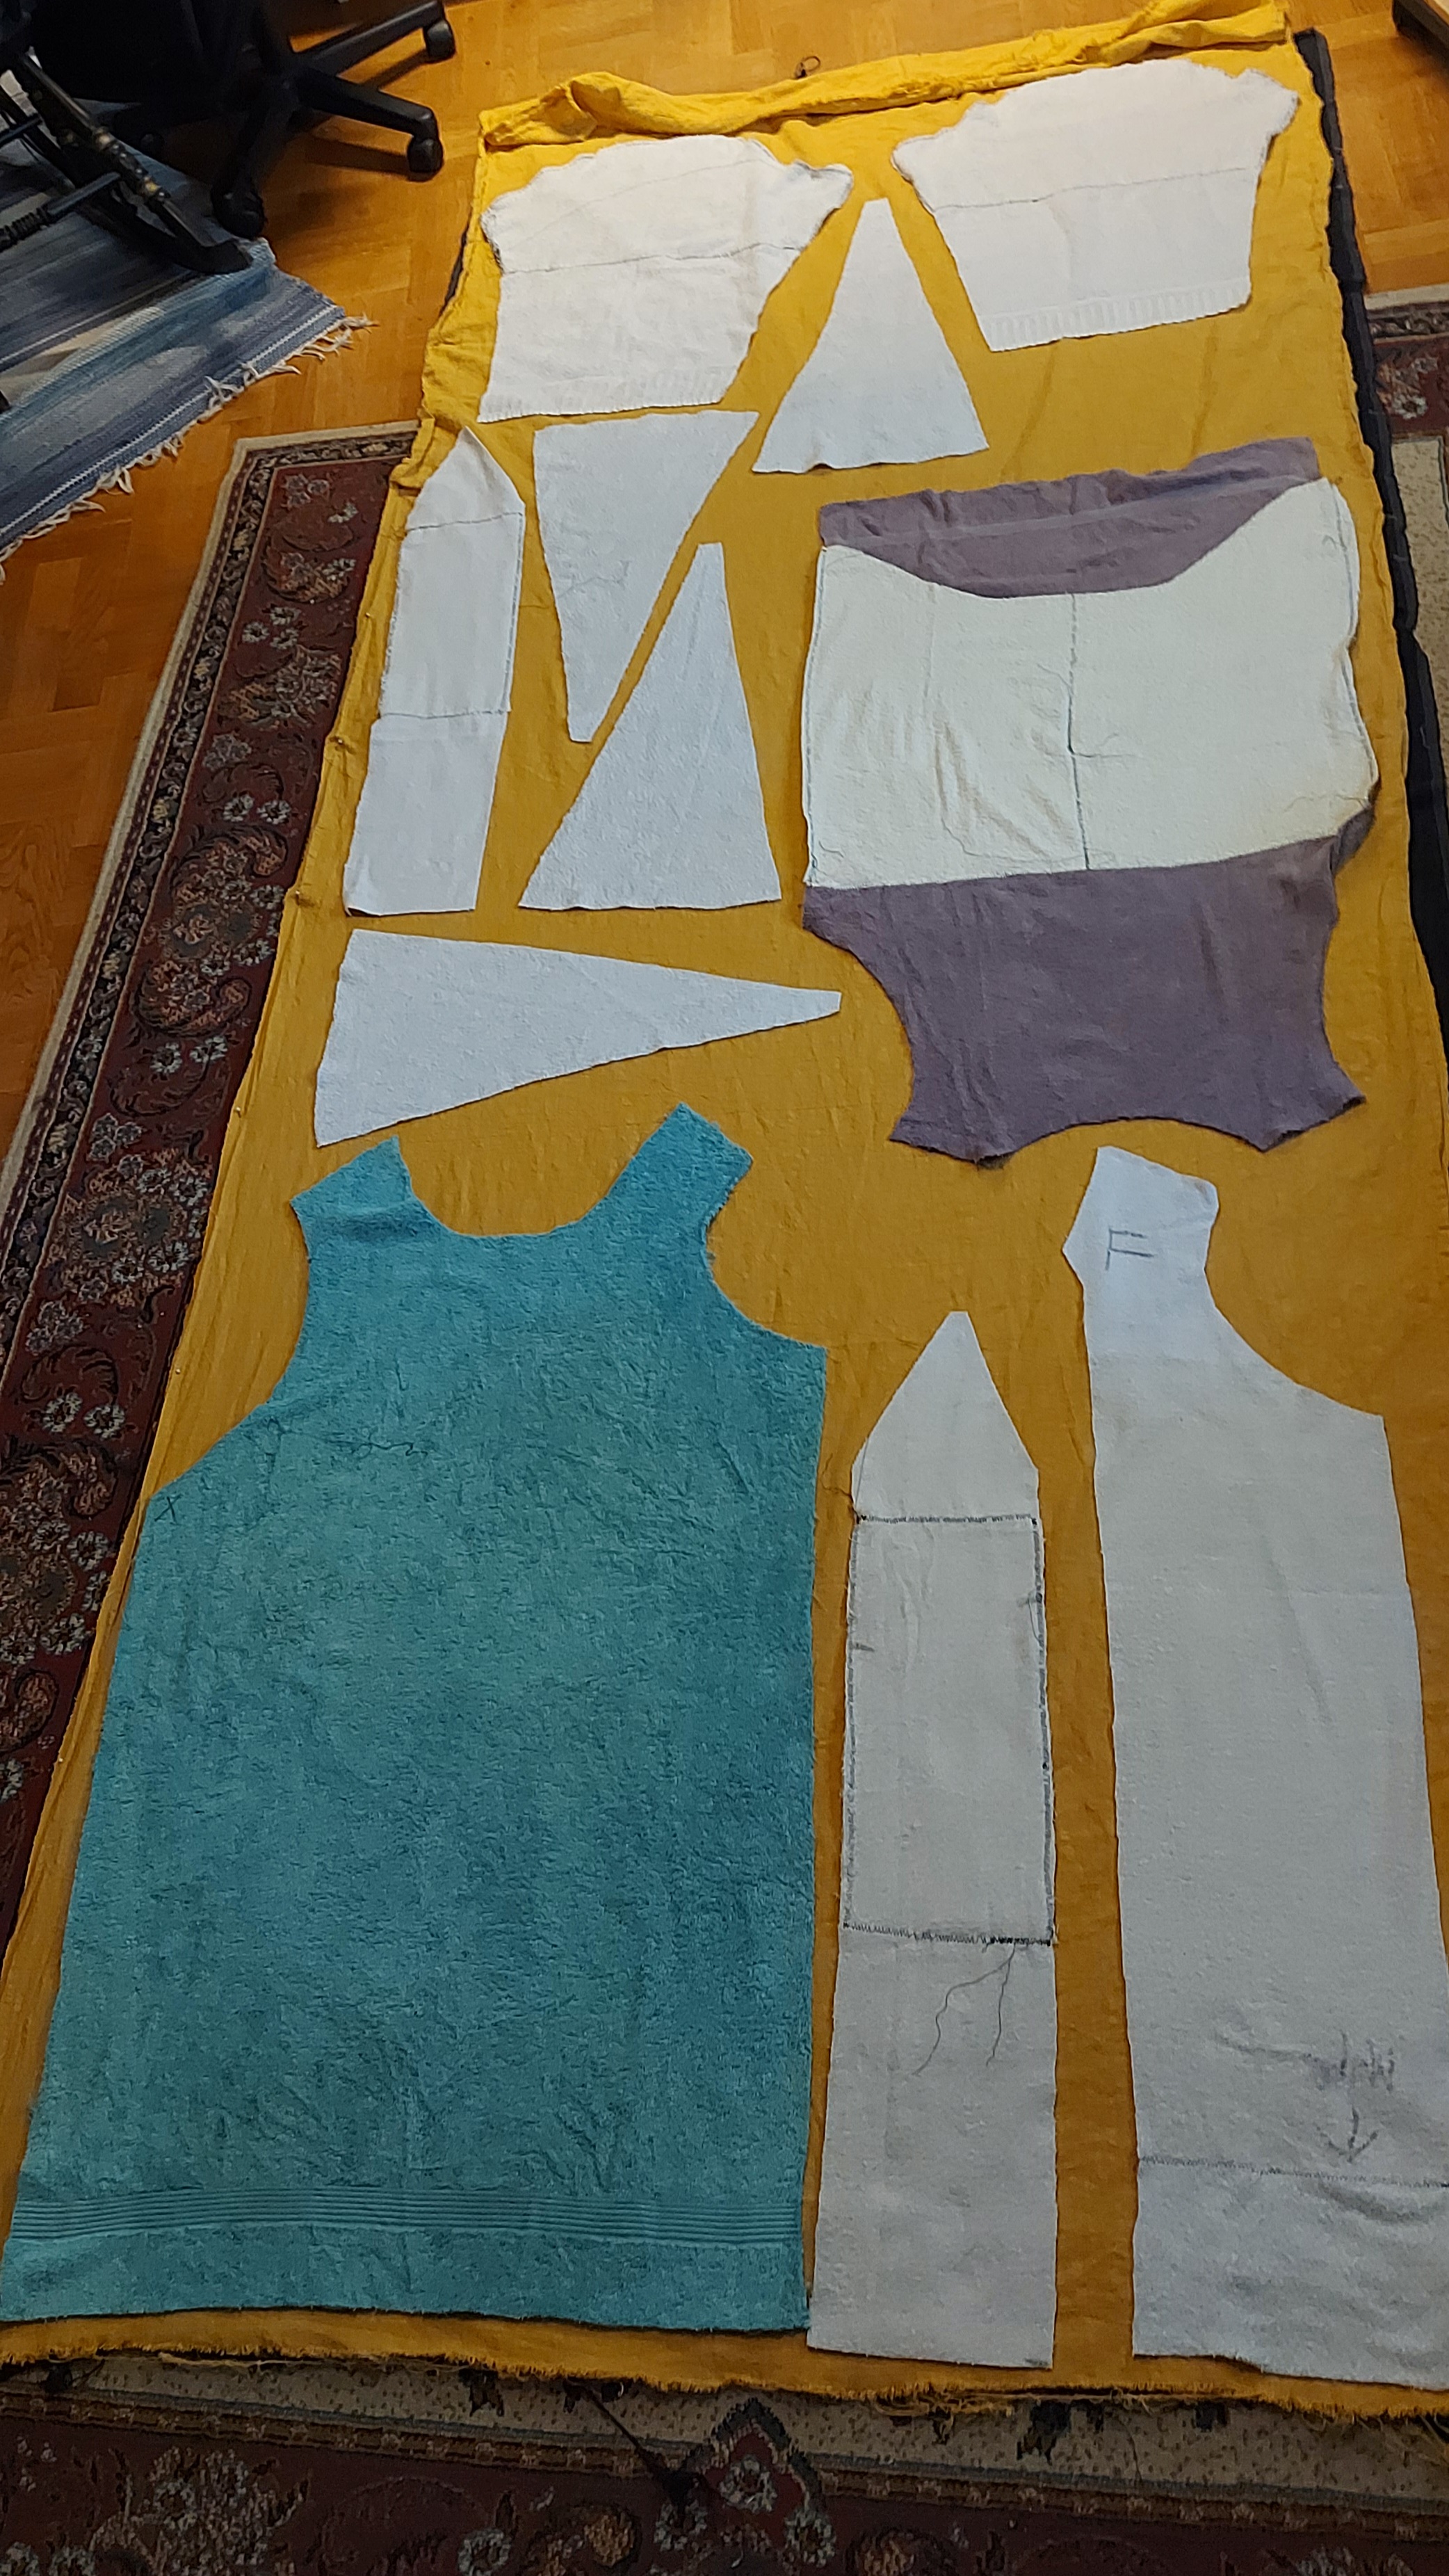
On 2026-07-22 Gilbert came over and we started cutting a gambeson for him. Even though his “inspired by” Image is later period, we opted to use rectangular construction, because easier.
He bought both black and yellow linen for the shell and lining, and old terry cloth towels for the padding.
I opted to jump straight to using the towels as the patterning fabric, draping a large one over his back, marking the curve of his neck and slope of shoulders, and cutting away what wasn’t needed.
lining pieces layout on fabric
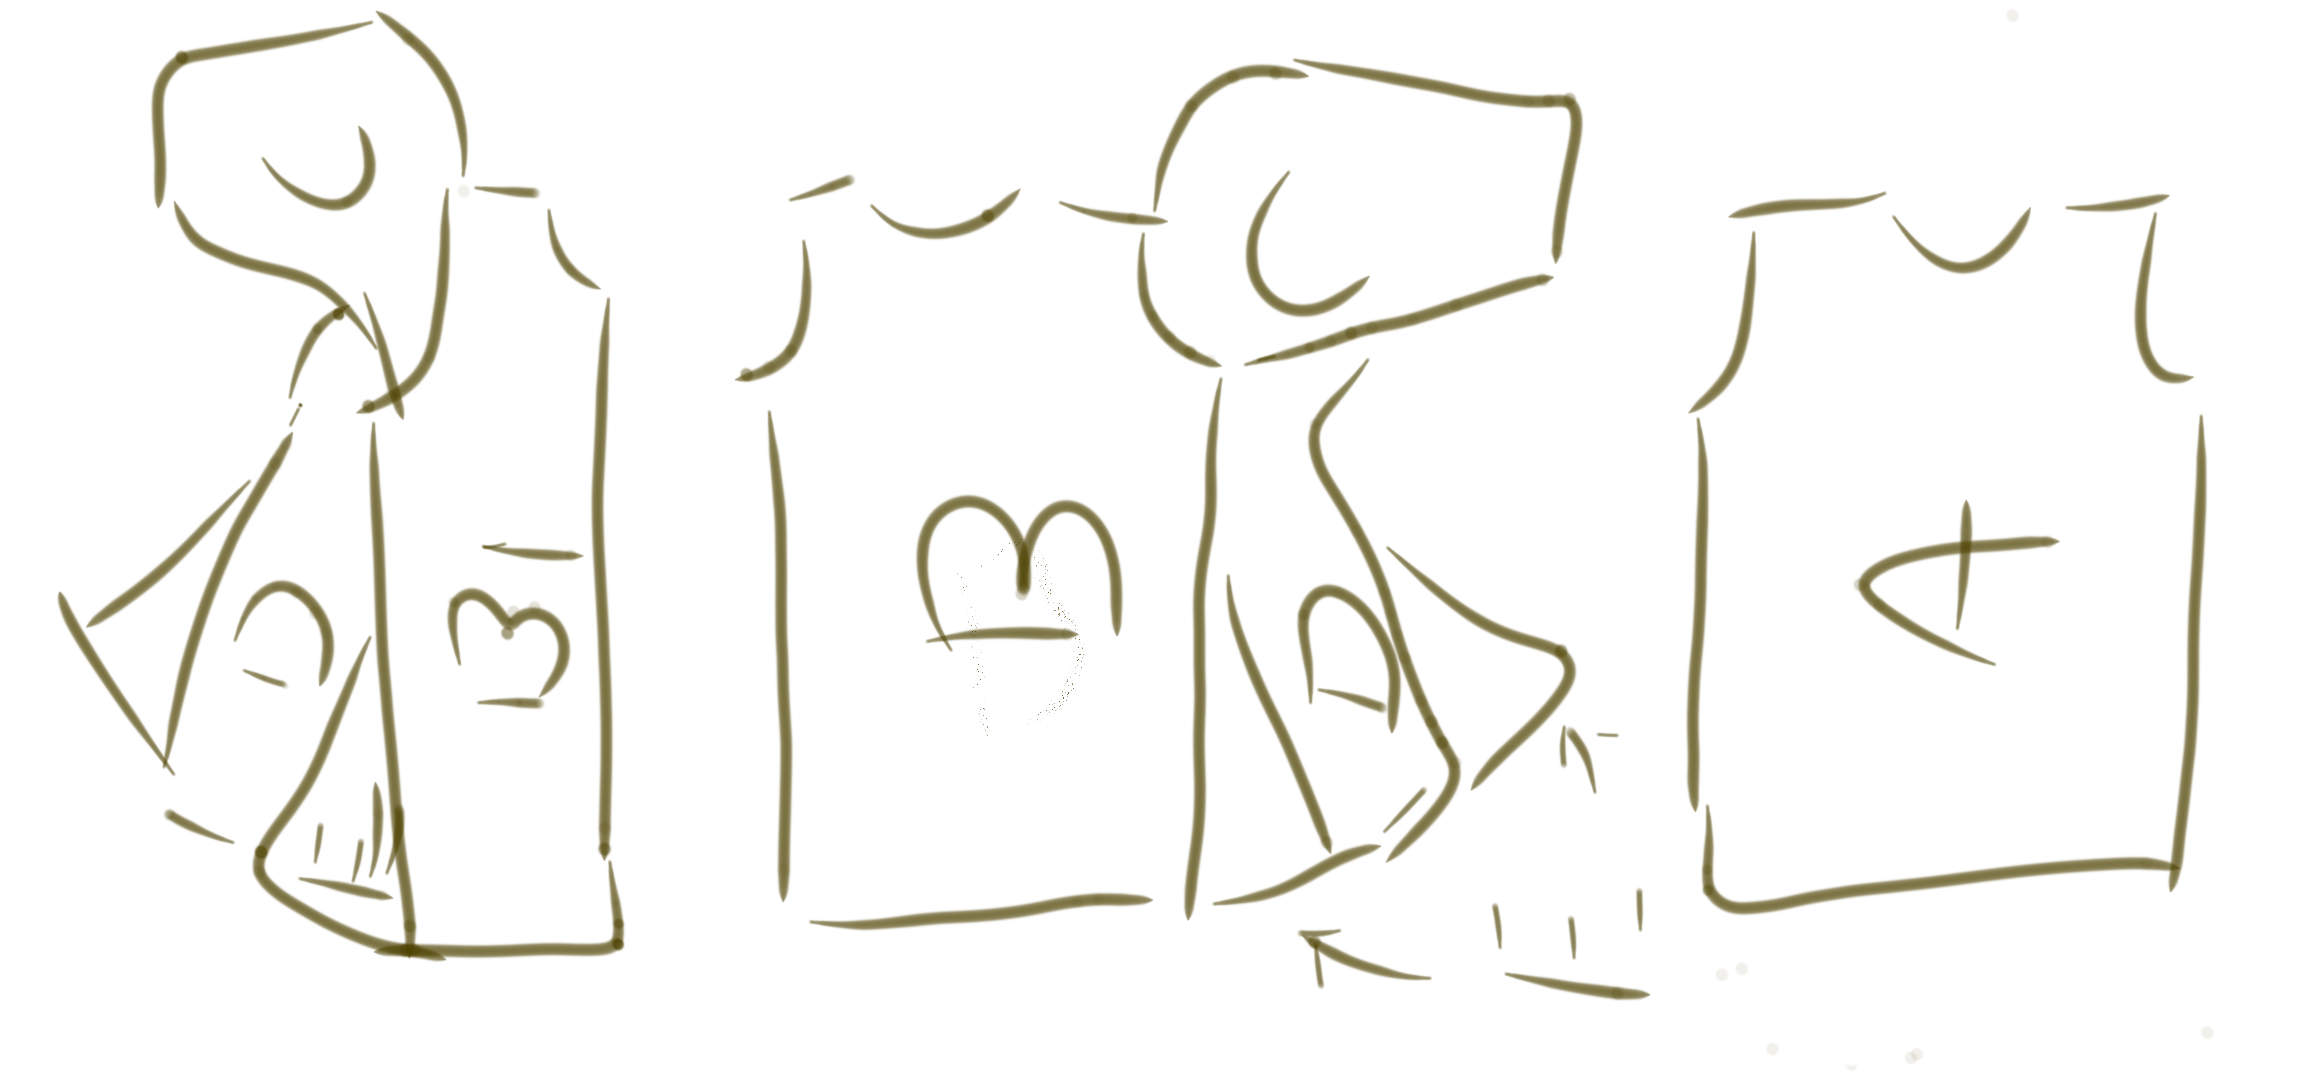
Diagram
quick sketch, made on my phone, with my finger, gives a rough idea of the project layout
in colour
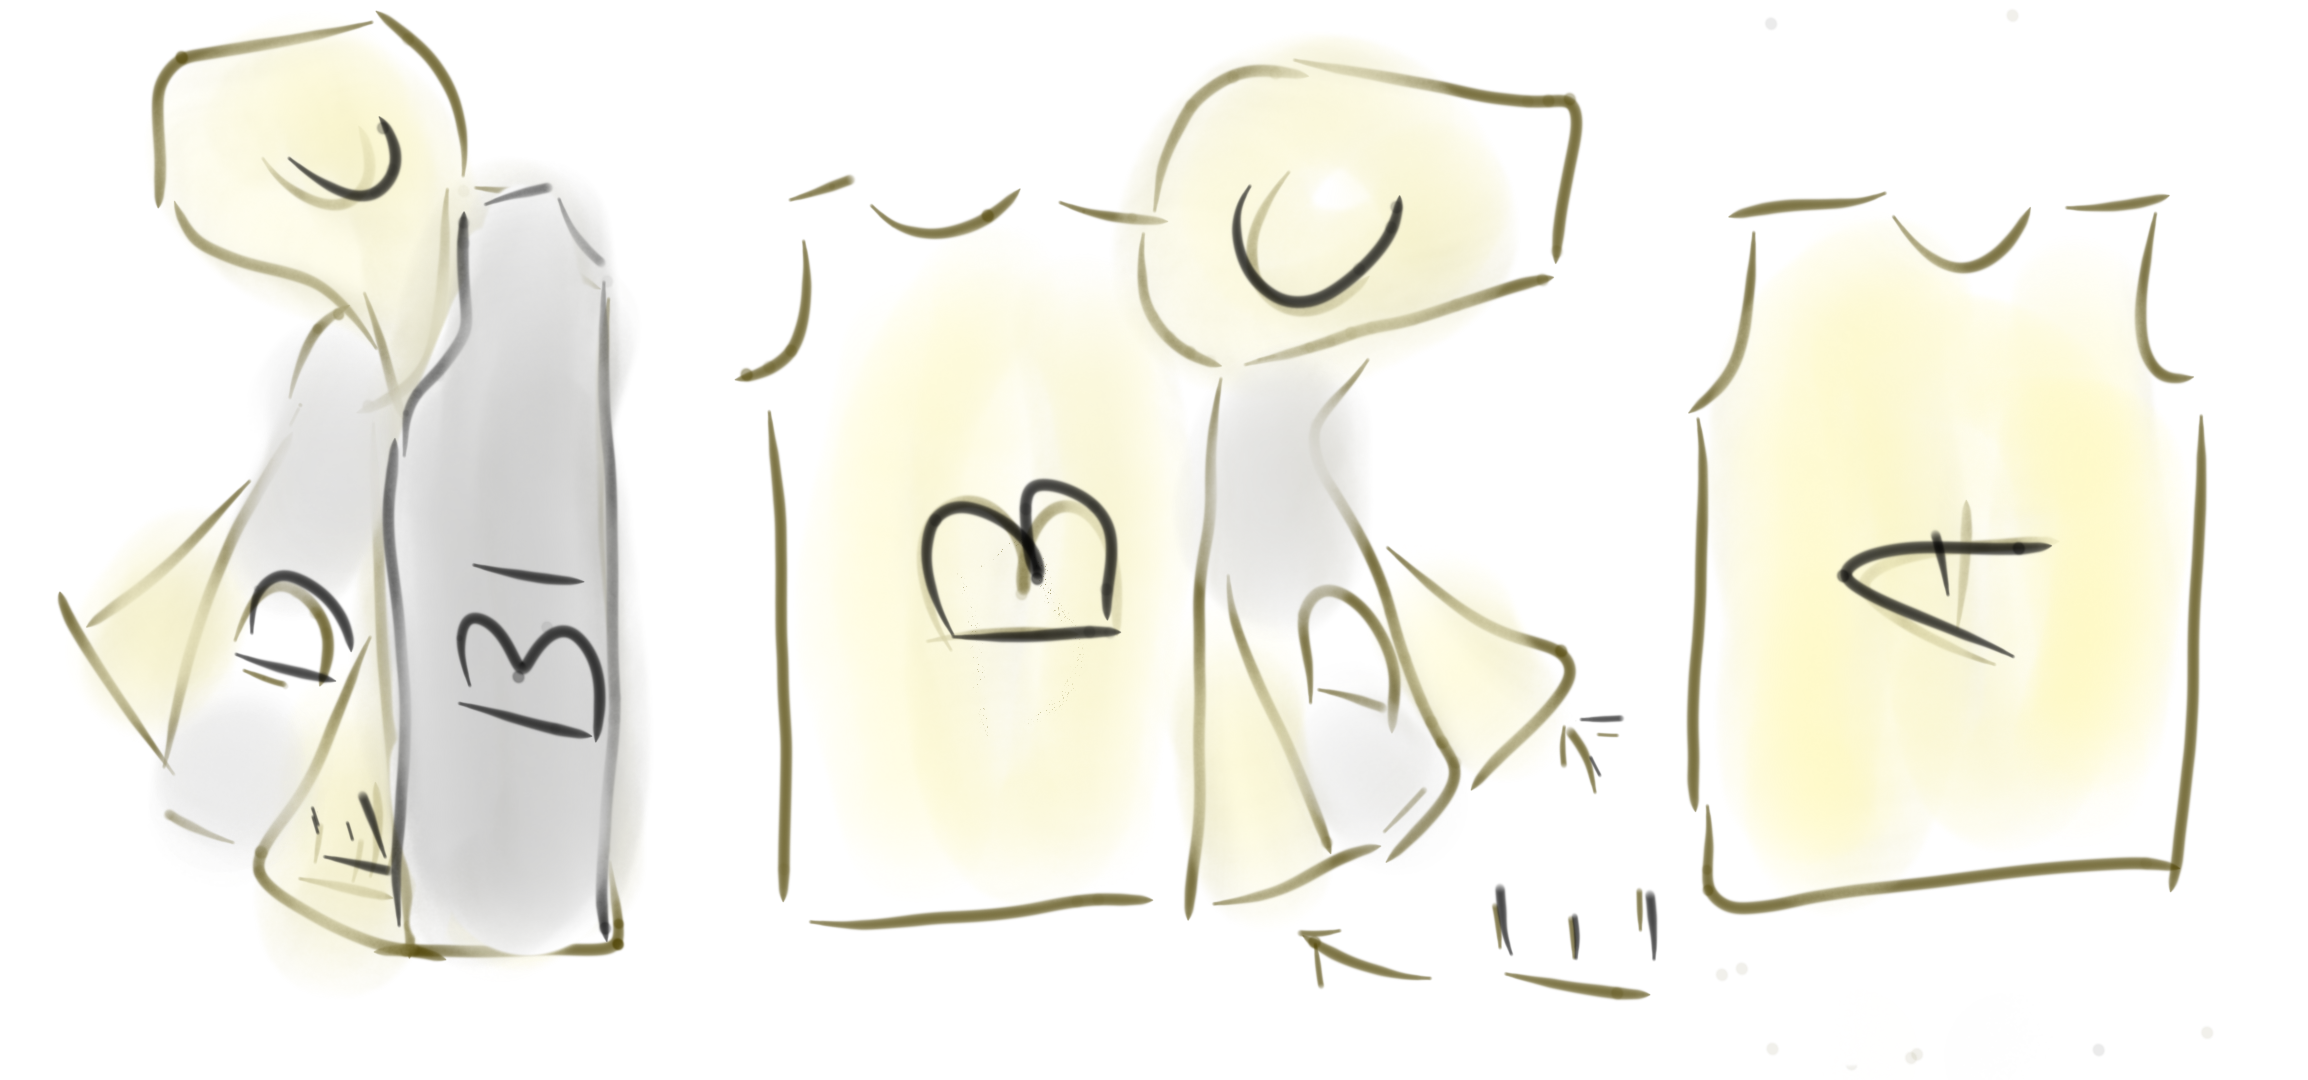
| piece | description |
|---|---|
| A | back center body (green lining) |
| B | front center body (purple lining) |
| B1 | extra half front body |
| C | sleeves |
| D | side body/under arm gores |
| E | triangle gores |
the plan
A yellow gambeson, with black side pieces (D), plus a black extra half front body (B1).
recommended assembly order
- take apart the D-E seam that was done before deciding that the sides should be black.
- reattach triangle E to the other side of D (so that you have a yellow triangle on a black side piece
- sew another E to the other side of that D (so there is a yellow triangle on each side of the black side rectangle).
[! Warning] the two side rectanglesare different lengths, because of the difference in the size of the armpit holes.
this may be a half mistake (perhapsthe slope of the triangleat the top should have changed instead? No idea, but we are going to go with it, so don’t lose track of which is which.
the one with two triangles attached should be on the side that does not open.
- sew the remaining two triangles (E) to the each side of the other side body (D)
- sew one E-D-E piece to the sleeve side of the half body (B1), to the outer/arm side of the half body (the side with the extra big under arm hole), such that the corner where it D changes from rectangle to triangle meets exactly the bottom corner of the armpit hole, and the triangle part sticks up free, ready to make the upper part of the sleeve wider.
- sew the other E-D-E piece to the opposite side of the main front body rectangle (B)
- sew A to B at each shoulder seam
- sew the sleeves (C) to the armholes on A-B. Make the curves fit so that the points of the sleeve transition from armhole to sleeve exatly match the edges of the armhole curve on A-B. Make certain that they go on the correct side—the front of the arm has a deep cut out curve that permits your arm to come forward without bunching up too much fabric, while the back has a curve with extra fabric so that your shouler can come forward without ripping out the seam
- sew shut the sides, taking care to line up the bottom hems, the point of the sleeve armpit, and the sleeve cuffs. The diagonals involved should permit enough adjustment for it to come out perfectly. If it should happen that you can’t force the short seam on the sleeve to line up both at the armpit and the cuff, you can modify the cuff, but don’t do this unless absolutely necessary.