I started helping Bryan cut out a new Viking style coat during the 2026-09-19 training day, where we got most of the main bits done. The gores were cut the next day , and we determined he has just enough trim to line the body, if we use a different lining for the sleeves.
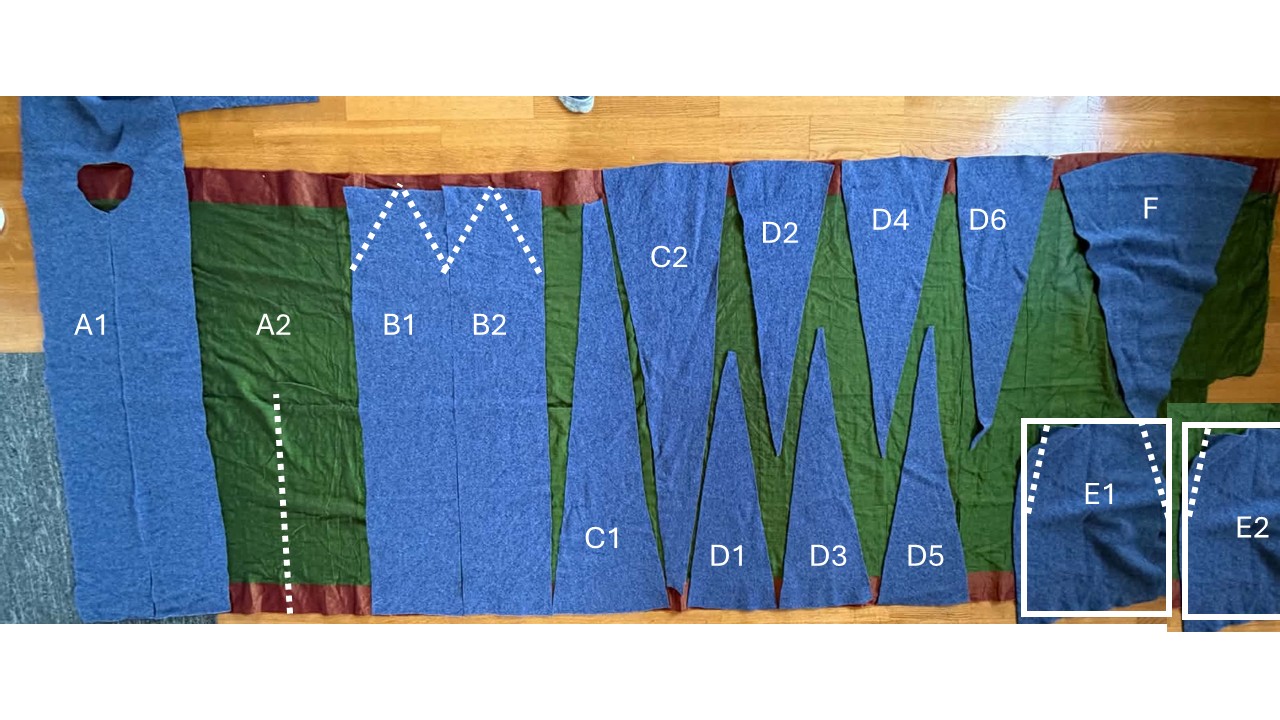
| piece | name | how many | comment |
|---|---|---|---|
| A | main body rectangle | One | However, the front (A1), is slit from the neck hole down, while the back (A2) is one solid piece, that will get slit to the waist to insert triangle F |
| B | side body rectangles | Two | The left and right sides will get cut to points from the armpit to however far up the arm they will reach |
| C | long front center gores | Two | These will go on either side of the front slit, to make the body longer |
| D | small side gores | 4 main 2 extra | The four main D pieces go between the A and B pieces (attach one to each side of pieces B first, than later sew the composite B-D pieces to A) The two extra D pieces can go between A and C or between A and B Always sew the diagonal cut part of D to a straight edge of something else. |
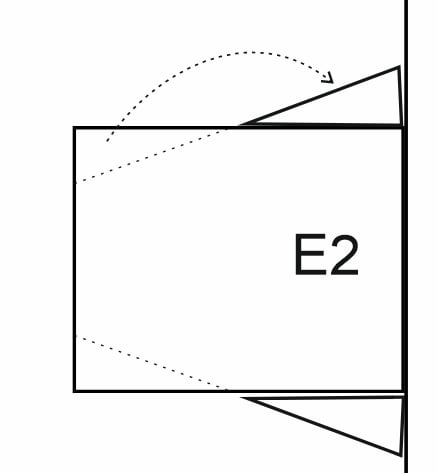
| E | sleeves | Two | These will be trimmed to a more appropriate width for the cuff, by removing triangles to the elbows. If you like, those triangles can be rotated around and attach to the upper arm part of the sleeves. |
| F | center back gore | One | This one will be inserted into the center back (A2) panel |
| Since the lining fabric is sari silk, it has a copper band along the edge, so the plan is to keep that as decoration along the bottom hem. Since each of the D triangles are narrow, it works to rotate them just a little, and then cheat the straight edge of the sari fabric to the align with the curve of the bottom of the triangle. | |||
| However, the wider triangle F will need some sort of piecing to make it work. |
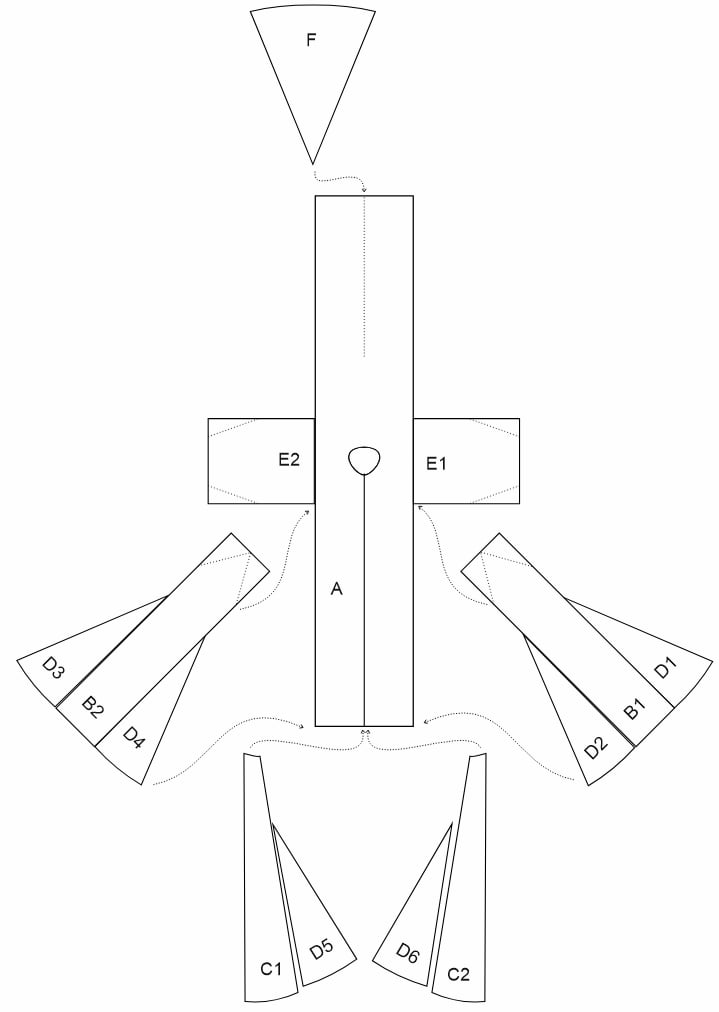
assembly diagram
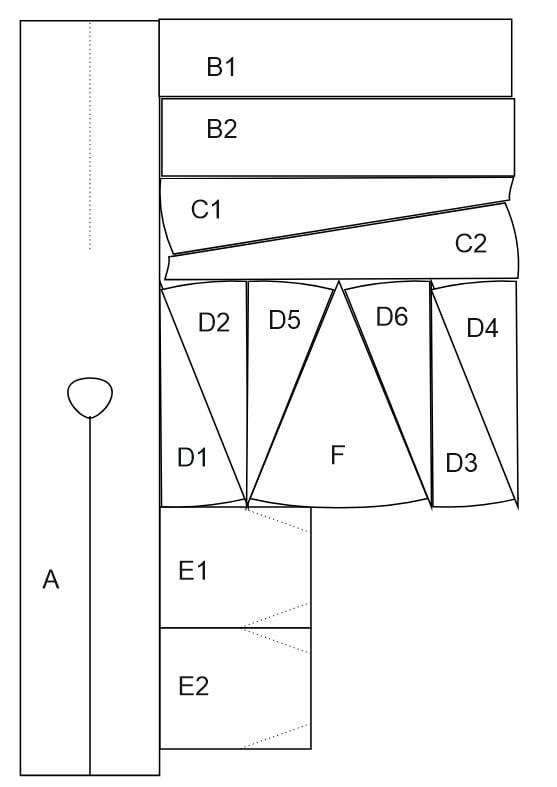
cutting diagram
trick to make sleeves wider at the shoulders
This especially helpful if the fabric wasn’t quite wide enough in the first place